Getting through the TSA checkpoints is usually a slow process but you can get through faster by following a few of these guidelines and move through the checkpoint like a pro. Become an expert traveler. Some of these may seem very obvious but through observation I have learned most people do not follow the basics.
Be prepared before it is your turn and this means doing some proper packing at home.
How to pack:
- Get your liquids in the 3-1-1 bag at home and pack this bag on a small outside pocket for easy access when you get to the security checkpoint.
- Most of the time I don’t even bother taking out this little bag of liquids anymore and usually they do not even notice and I can’t remember the last time they rescanned my bags because of it.
- Put your wallet, watch, cellphone, and any other items you would need to remove into your carry-on bag before you get in line (but hold on to your boarding pass).
- Pack your electronics in a neat and orderly fashion. This includes over-ear headphones, travel speakers, adaptors or power cords. The better it looks under the scanner the less chance of a rescan.
- Use a TSA acceptable laptop case so you don’t have to completely remove it. I use a folding one that simply unzips to reveal the contents saving me some time.
- With MacBook Airs you can usually get away with not taking it out since it is about the size of an iPad it often gets right through for me.
What Causes Rescans?
- An electronic mess. Tangled cords and poorly packed bags. Pack neatly so the agents can see what you are hiding in there.
- Full bottles of liquid- I have tried this unsuccessfully many times either by accident or just to see what happens. They have actually found it 100% of the time, however once missed a pretty large knife I left in my backpack.
- A large laptop you did not remove from your bag (iPads, tablets, and even MacBook Airs are ok most of the time without being removed)
- Any excessive amount of electronics seem to catch their eye.
Dress According to the checkpoint needs:
- Wear slip on shoes or at least untie or unzip your shoes before it is your turn to go through security.
- Remove your belt quickly and stash it with your shoes and jacket
- Empty your pockets (do this before you get in line or while you wait)
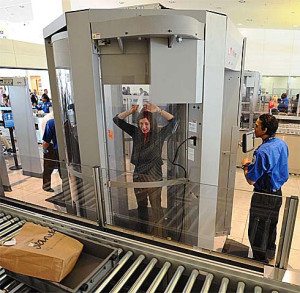
Don’t be that person who refuses to go through the body image scanner. First, of all you are going to get more radiation from your flight than going through that thing 100 times.
One scan from a typical “backscatter” security scanner might deliver 0.005 to 0.01 millirem – far, far below the 10,000 millirem that is considered the danger threshold.
Taking a flight from New York to Los Angeles might expose you to between 3 and 4 millirems, at least 300 to 400 times higher than the airport scanner.
Now most of this seems obvious but if everyone followed these simple steps we wouldn’t be standing in line so long at airport security checkpoints. I make an effort to be prepared when it is my turn to put my belongings through the scanner. Not only do I move through faster so does everyone behind me.
Keep in mind how many bins you will need. I always use two no matter what. One bin for my laptop and one for jacket/shoes/belt/etc. Don’t be the person who uses 3 or even 4 of those grey bins. It slows everyone down.
My Favorite TSA security checkpoint hacks:
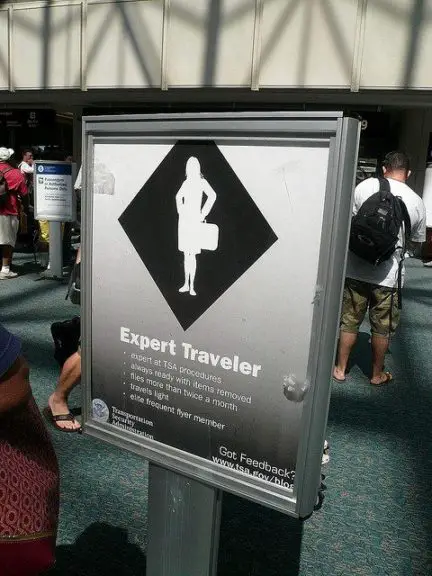
1. I almost do not want to share this one because it is so awesome and simple but plenty of people know about it they just don’t use it. First, take a look at the graphic below from the TSA.
What Kind of Traveler Are You?
Expert:
|
Casual:
|
 Family/Medical Liquids: Family/Medical Liquids:
|
Do these signs look familiar? Most travelers fall into “Casual” traveler blue line. This is where we want to send the slow people and families go to the green line. Many airports have the “Expert” travelers line. See below: |
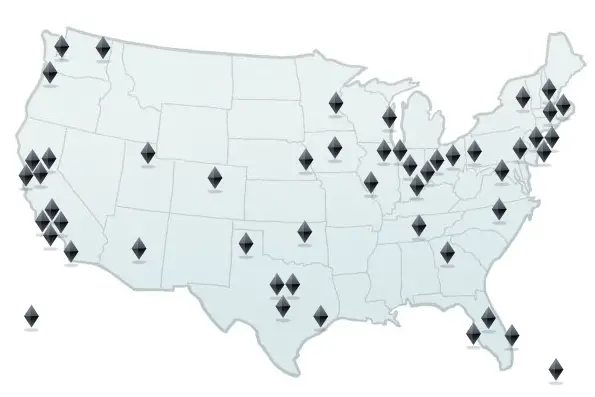
TSA.Gov has an interactive map.
Now luckily my home airport, MSP, has this expert traveler lane. Is is located to the far left of the departures terminal for those who call Minneapolis home. Nobody is ever in this lane. There can be a 30 minute “Casual Traveler” lane wait and I just walk into this “Expert” lane no questions asked. It is that simple. You are the only one who determines if you are an expert traveler and all you need to do is act like one and be prepared to move through security quickly without slowing everyone down. The only time I do not use this lane is when they close it for airline personnel only which is pretty rare. It is an incredible time saver and I can check-in and be at my gate in 15 minutes.
Bottom line if your airport has an “Expert Traveler” lane find it and use it if traveling solo or with a friend. If you have kids they will probably direct you to the family line which is where you should be.
2. Don’t be afraid to test some limits. This doesn’t mean you should do anything illegal but it does mean make the process easier for yourself. Yes, you may defeat the entire purpose of avoiding rescans but if you are traveling very light you can get away with not unpacking every little item and putting it in a grey bin. Try leaving your liquids in the plastic bag in a pocket on the outside of your bag and see what happens if you leave your MacBook Air(or other slim portable) and iPad in there too. They say you can leave the iPad but I still see people taking it out. Leave it in your bag. Find your limits and once you know what works you can stick with that.
3. I already mentioned this but just be prepared. Get everything from your pockets into your backpack or briefcase or bag. This way you won’t leave anything behind and you can get them all out when you get to your gate. I always wait until I get to my gate to retrieve my cellphone and wallet from my backpack.
Lastly, we can all become travel experts and all it takes is being prepared for any situation which includes something as boring as the security checkpoint at the airport. We can improve the airport experience but we all need to make small changes. We can’t blame the TSA for everything. Just look around at the fellow travelers before you cast your blame on the nearest guy in blue.


